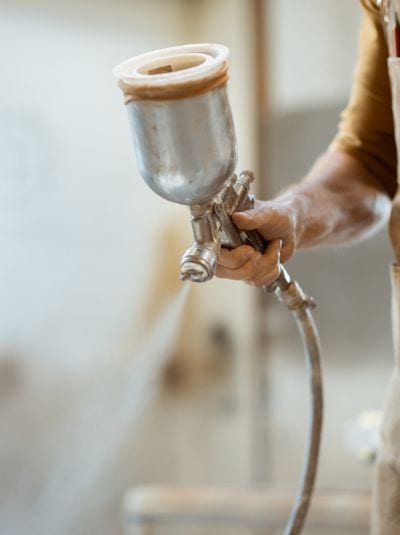
 A paint sprayer is a powerful tool that can transform the look of your interior spaces quickly and effectively. Unlike traditional painting methods, paint sprayers offer a smooth, uniform finish often achieved in a fraction of the time. However, utilizing a paint sprayer requires some knowledge and preparation to ensure the best results.
This guide will walk you through the process of using a paint sprayer for interior painting, from prepping your space to cleaning up after the job, helping you to revitalize your spaces with ease and confidence.
Preparing Your Space
Before you begin painting with a sprayer, it’s essential to prep your space properly. Start by removing all furniture and decor from the room or covering them with drop cloths to protect them from overspray. Next, remove any fixtures or hardware that you don’t want to be painted, and cover light switches and outlets with painter’s tape.
Next, thoroughly clean the walls to be painted. This step is crucial as any dirt or debris on the surface can affect the finish of your paint job. Use a mild detergent and water solution to scrub away any grime, and then rinse with clean water. Allow the walls to dry completely before moving on to the next step.
Finally, fill any cracks or holes in the walls with spackling paste and sand them smooth once dry. This will ensure a smooth surface for your paint to adhere to.
Preparing the space is the most important step, and it may even require some skill and knowledge. If you’re not sure you can DIY this part, it’s always a good idea to consult a professional to learn more before proceeding.
Types of Paint Sprayers
There are three main types of paint sprayers: airless, compressed air, and high volume low pressure (HVLP). Each has its benefits and drawbacks, so it’s essential to research and choose the one that best fits your project needs.
- Airless sprayers are versatile and can handle a variety of paints and coatings. They are also faster than other types of sprayers, making them ideal for larger projects.
- Compressed air sprayers require an air compressor and are more affordable than other options. However, they can be messy and often require more paint thinning.
- HVLP sprayers produce less overspray than other types, making them ideal for detailed or smaller projects. They also offer a smoother finish, but they can be slower and require more frequent refills of the paint reservoir.
Setting Up the Paint Sprayer
Before you begin painting, it’s essential to set up your paint sprayer correctly. Start by selecting the appropriate tip size for your project. The bigger the tip, the more paint it will spray, so choose accordingly. Next, fill the sprayer’s reservoir with your desired paint and thin it according to the manufacturer’s instructions.
Attach the sprayer’s hose to the gun and plug in any necessary cords or batteries. Test the spray pattern on a piece of cardboard or scrap wood before beginning your project to ensure it is spraying evenly and at the desired pressure.
There may be a slight difference in how you use different types of paint sprayers, but for the most part, the process should be similar to what we described. In any way, most sprayers come with instructions, and we suggest you read those to learn exactly how to set up your sprayer properly.
Painting with a Paint Sprayer
Now it’s time to start painting! Hold the sprayer about 12 inches from the wall and move your arm in a smooth, consistent motion. Start at one corner of the room and work across, overlapping each pass slightly to ensure full coverage. Keep the gun level and avoid stopping or starting in the middle of a wall to prevent uneven coverage.
If you are painting multiple walls, work in sections and allow each section to dry before moving on to the next one. This will ensure that the paint does not run or drip while drying.
Clean Up
Cleaning up after using a paint sprayer is just as important as any other step in the process. Start by emptying any remaining paint from the sprayer and wiping it down with a damp cloth. Next, disassemble the sprayer and clean each part thoroughly with warm, soapy water. Allow all parts to dry before reassembling.
Finally, clean up your workspace by removing drop cloths and replacing furniture and decor. Properly dispose of any leftover paint or materials according to your local regulations.
Additional Tips
- Wear protective gear, such as a mask and goggles, when using a sprayer to avoid inhaling overspray or getting paint in your eyes.
- Use a primer before painting for enhanced adhesion and coverage.
- Practice on a small test area before tackling larger projects to get familiar with the sprayer’s settings and techniques.
Leave a Reply